How to Create Rainbow Buttercream
Learn how I create multicoloured buttercream swirls using only one piping bag
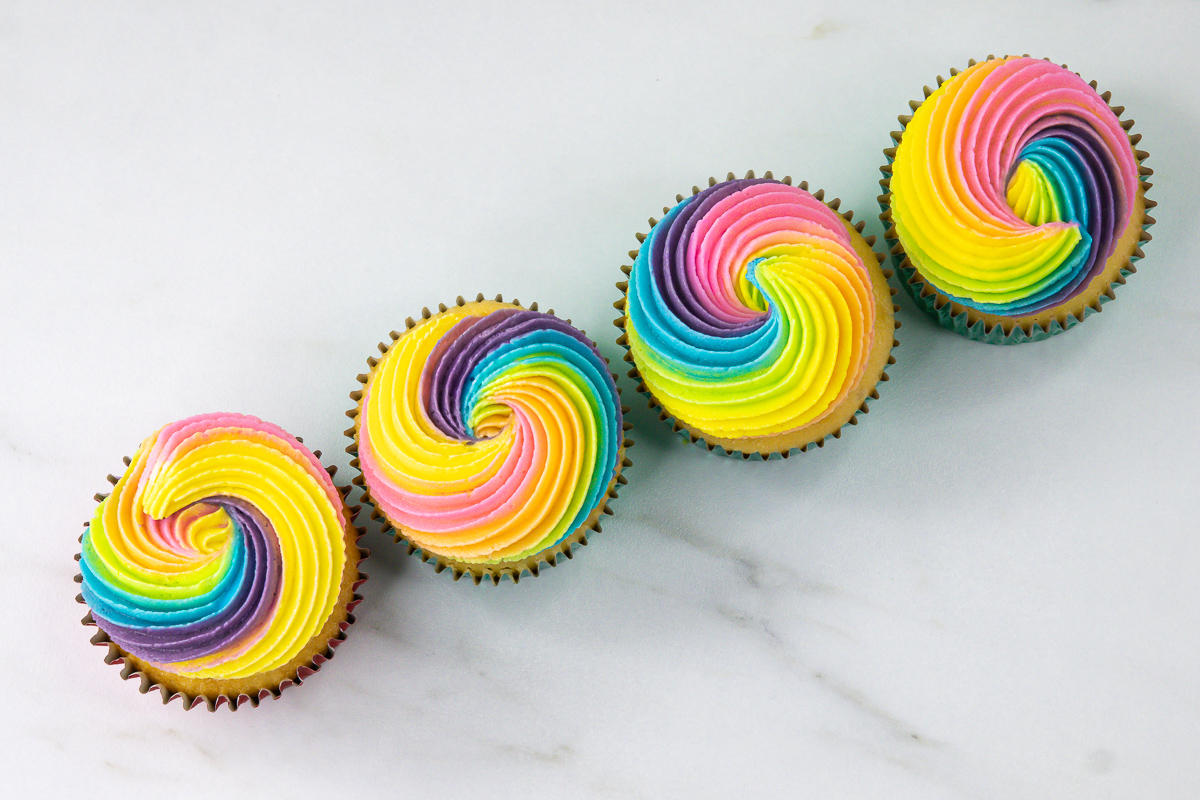
I still remember starting out and seeing beautifully coloured buttercream swirls online without having any idea how people created them. The colours looked so clean and evenly blended, and I assumed it must take lots of piping bags or complicated techniques.
This method is actually much simpler than it looks. By laying multiple colours of buttercream onto cling film before adding them to the piping bag, you can create bright multicoloured swirls with very little mess and much more control over how the colours appear.
It is one of my favourite decorating techniques because it works with so many colour combinations and can completely transform the look of cupcakes with very little extra effort.
Why This Method Works
This technique uses multiple colours of buttercream wrapped together in cling film before being added to a piping bag. As the buttercream pipes through the tip, the colours blend together to create bright multicoloured swirls.
One of the things I love most about this method is how versatile it is. You can use soft pastel shades, bold rainbow colours, or even two-tone combinations depending on the look you want to create.
I recommend using my Basic Buttercream for this technique, as it pipes smoothly while still holding its shape well. If you are new to colouring buttercream, my How to Colour Buttercream Guide will help you achieve bright, vibrant shades. For darker or more difficult colours, I also use the Microwave Method to deepen the buttercream colour without needing to add too much colouring.
Although the swirls look detailed, the process is actually very simple once you understand how to load the colours into the piping bag correctly. The cling film also makes cleanup much easier compared to adding colours directly into the piping bag itself.
What You’ll Need
Buttercream
I recommend using my Basic Buttercream for this technique. It pipes smoothly, holds its shape well, and colours beautifully, making it perfect for creating bright rainbow swirls.
Gel food colouring
To create bright, vibrant rainbow colours, I always use gel food colouring. Gel colours are much more concentrated than liquid colourings, so you can achieve bold colours without affecting the consistency of the buttercream.
For this tutorial, I used Wilton gel food colourings to create the rainbow shades.
Mixing bowls
You will need separate bowls for each buttercream colour.
Small spatulas or spoons
Use small spatulas or spoons to mix the colours into the buttercream and transfer them onto the cling film if needed.
Small piping bags (optional)
I like to place each colour into a small piping bag and pipe the buttercream directly onto the cling film. This helps create neat, even stripes and keeps the colours separated.
Cling film
Cling film is used to wrap the coloured buttercream together before placing it into the piping bag. This keeps the colours neatly separated and makes cleanup much easier.
Piping bag
A large piping bag works best, as it needs to hold all seven colours comfortably.
Piping tip
You can use almost any piping tip with this method. I used a Wilton 8B piping tip to create the swirls shown in this tutorial.
Scissors
You’ll need scissors to trim the end of the cling film before placing it into the piping bag.
How to Create Rainbow Buttercream Swirls
Step 1: Colour the buttercream
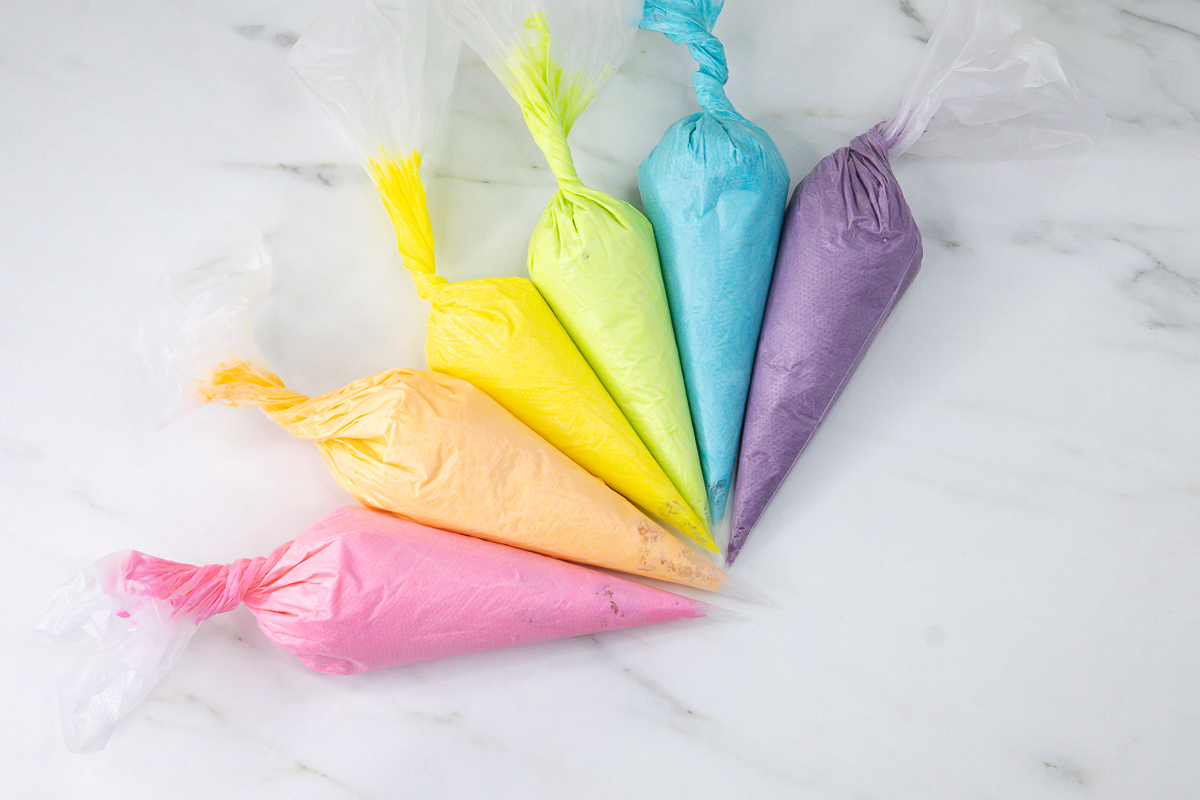
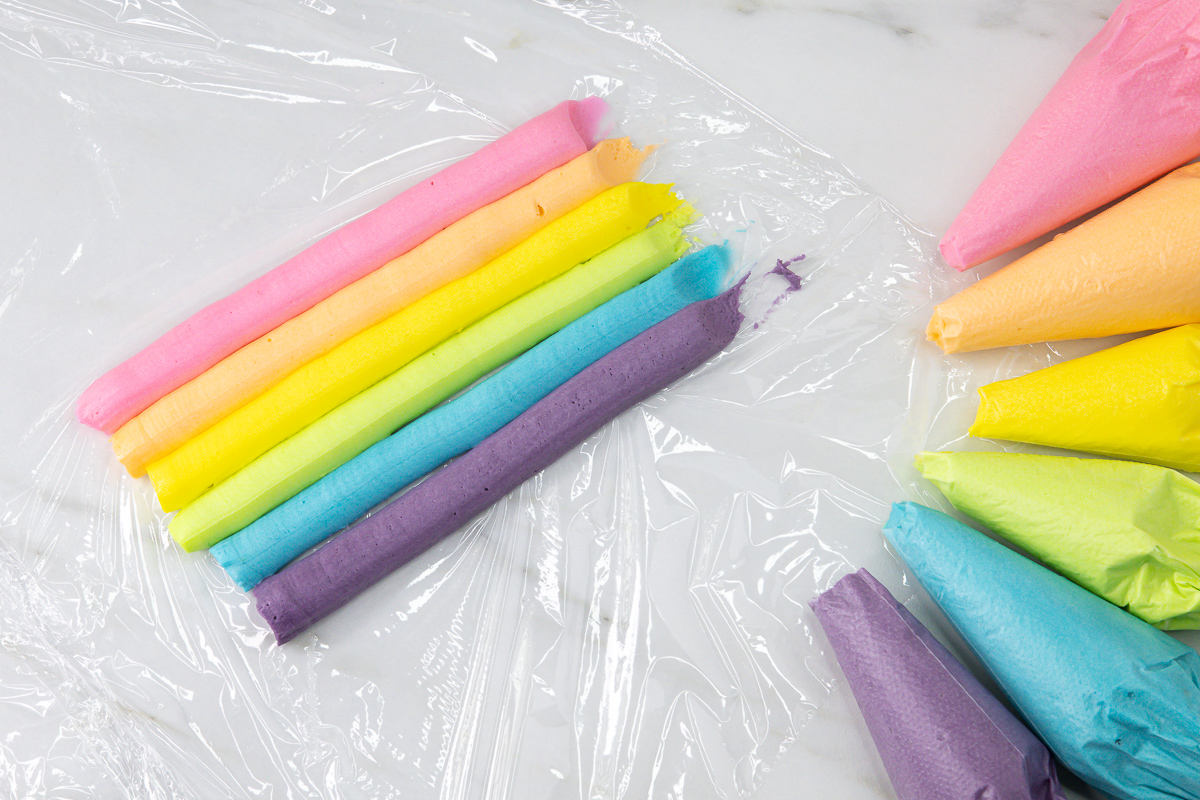
Colour your buttercream in rainbow shades and place each colour into a small piping bag. I find this makes it much easier to create neat, even lines of buttercream on the cling film.
Step 2: Pipe the colours onto the cling film
Lay a large sheet of cling film onto a flat surface. Pipe each colour side by side in long strips, arranging them in rainbow order.
Step 3: Roll the cling film into a sausage shape
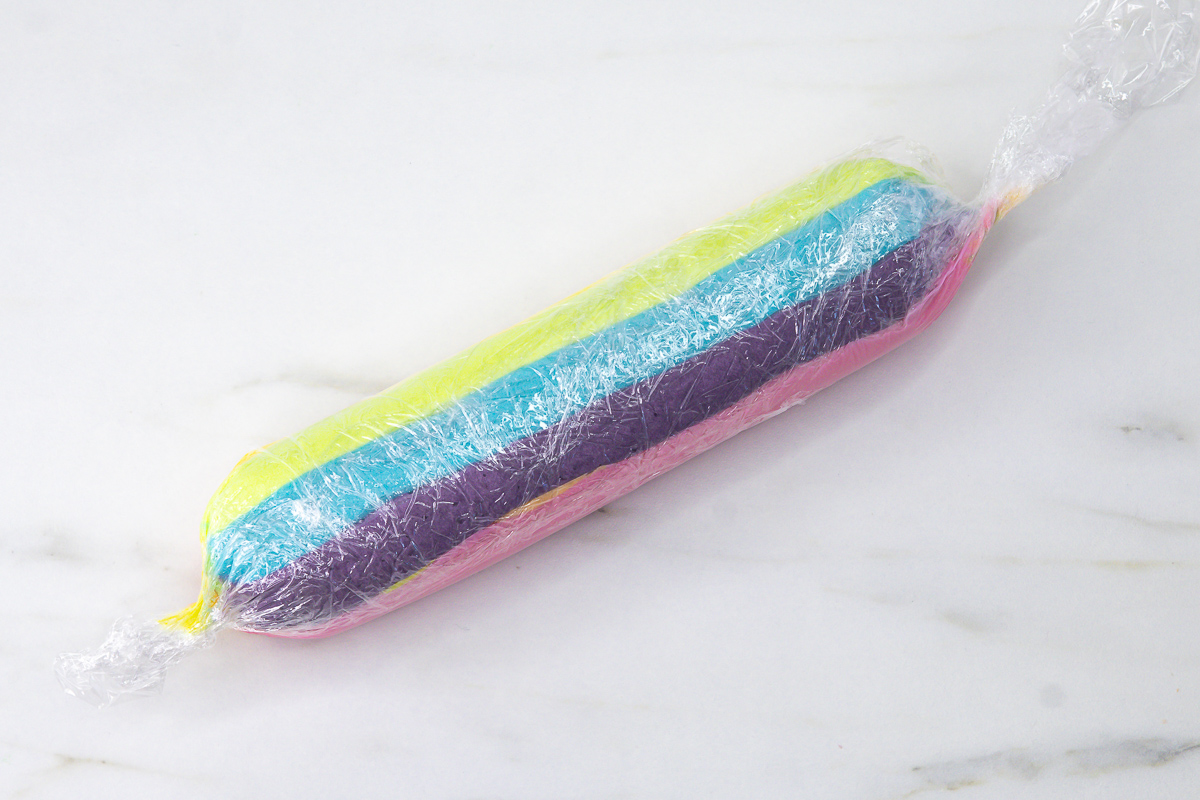
Lift one edge of the cling film and carefully roll it around the buttercream until you have a long sausage shape. Twist both ends to secure the buttercream inside.
Step 4: Add the buttercream to the piping bag
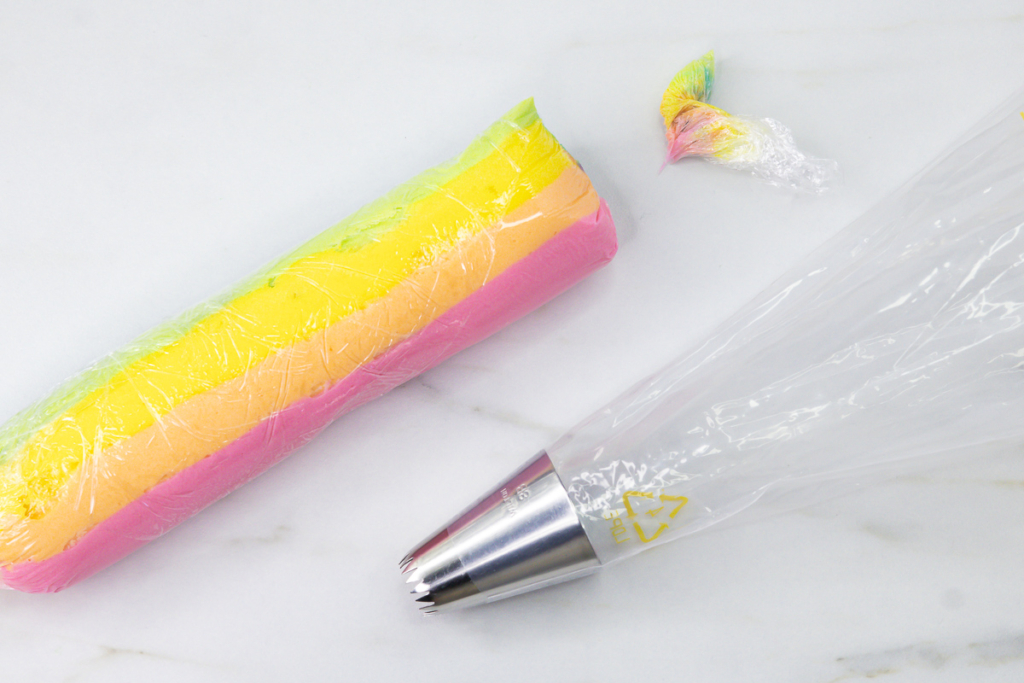
Fit a large piping bag with a Wilton 8B piping tip. Trim one end of the buttercream sausage and slide it into the piping bag.
Step 5: Twist the top of the piping bag
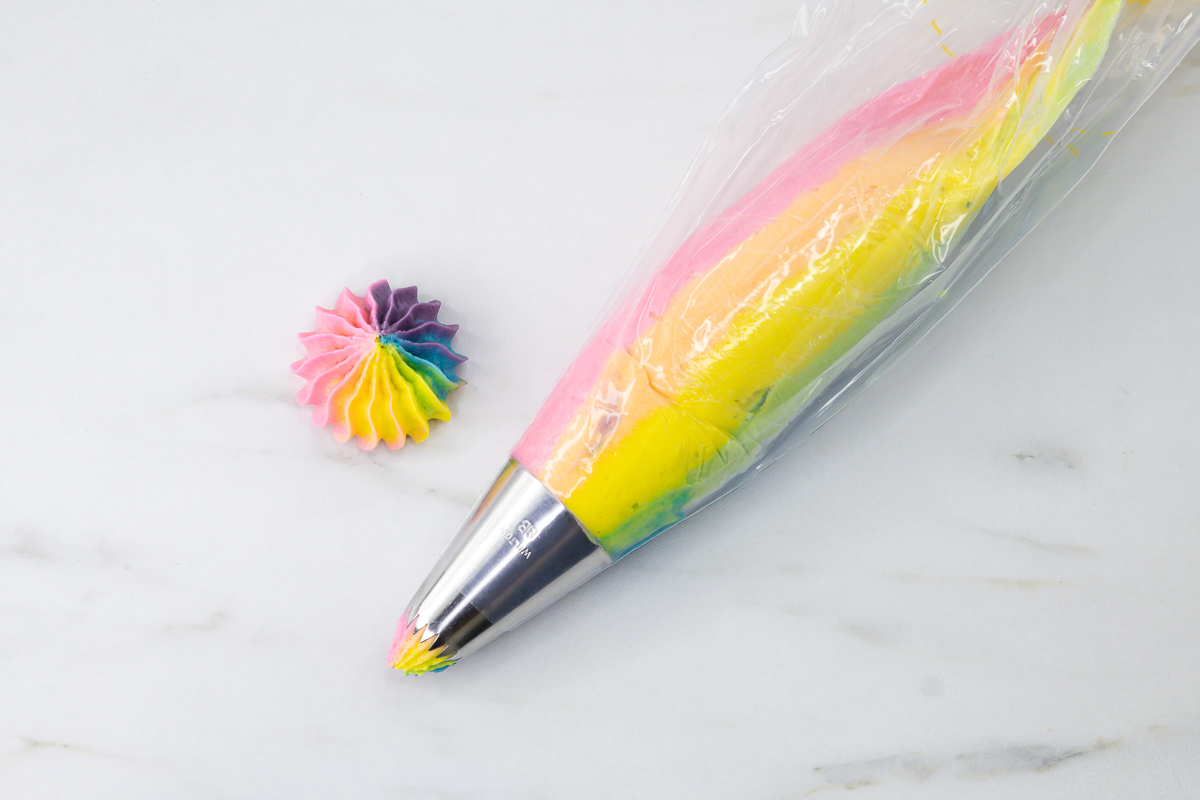
Once the buttercream sausage is inside the piping bag, twist the top of the bag to secure it. This helps create even pressure while piping and prevents the buttercream from escaping through the top of the bag.
Step 6: Pipe the rainbow swirls
Start in the centre of the cupcake and pipe the buttercream in a spiral, working your way outwards until you reach the edge of the cupcake. Release the pressure and gently lift the piping tip away to finish the swirl.

Tips for the Best Rainbow Swirls
Use gel food colouring
Gel food colourings create bright, vibrant colours without changing the consistency of the buttercream. I always use gel colours when making rainbow swirls.
Keep the buttercream consistency the same
Try to keep each colour of buttercream the same consistency. If one colour is softer than the others, the swirl may pipe unevenly.
Use equal amounts of each colour
For the most balanced rainbow effect, try to make each coloured strip a similar size before rolling the cling film.
Pipe a test swirl first
Before decorating your cupcakes, pipe a small test swirl. This helps all of the colours begin flowing evenly through the piping tip and allows you to check the colour placement.
Larger piping tips show the colours best
Large piping tips, such as the Wilton 8B, create wider swirls and help showcase all of the rainbow colours more clearly.
Leave space at the top of the piping bag
Avoid overfilling the piping bag. Leave enough space at the top to comfortably hold and twist the bag while piping. This gives you better control and helps create even pressure as the buttercream moves through the piping tip.
Frequently Asked Questions
Why are my colours blending together?
A small amount of blending is completely normal and is part of what creates the rainbow effect. However, if the buttercream sits in the piping bag for too long, the colours can begin to blend together more than you may like.
If you are decorating a large batch of cupcakes, try working in smaller batches and prepare a fresh buttercream sausage as needed. This helps keep the colours bright and distinct throughout the decorating process.
Can I use liquid food colouring?
I recommend using gel food colouring for this technique. Liquid colourings can thin the buttercream and make it more difficult to achieve bright, vibrant colours.
Can I use fewer colours?
Absolutely. Although this tutorial uses seven colours to create a rainbow effect, the same method can be adapted using fewer colours. Two-colour and three-colour swirls work beautifully too.
Which piping tip works best?
Most large piping tips work well for this technique. I used a Wilton 8B piping tip because the larger opening helps showcase all of the colours within the swirl.
Can I make the buttercream ahead of time?
Yes. The buttercream can be prepared in advance and stored in the fridge. Allow it to come back to room temperature and give it a quick mix before colouring and piping.
Do I have to use cling film?
Cling film is the easiest way to keep the colours separated and transfer them neatly into the piping bag. While there are other methods, I find cling film gives the cleanest results and makes cleanup much easier.
Do I need to put each colour into a separate piping bag first?
No. You can add the coloured buttercream directly onto the cling film using a small spatula or spoon if you prefer.
I like to place each colour into a small piping bag first because it helps create neat, even lines of buttercream and makes the process a little tidier, especially when working with multiple colours. Both methods work well and create the same final result.
Final Thoughts
The flip-and-freeze method is a simple technique, but it can make a big difference to how easy and enjoyable cupcake decorating feels. Starting with a clean, flat base gives you more control and helps create a polished finish, especially for detailed designs.
Once you’ve tried it a few times, this method quickly becomes second nature and is easy to adapt to different styles, shapes, and textures. It’s one of those techniques that quietly saves time and frustration while improving consistency across your cupcakes.